

Installing ESP32 drivers on Windows
In this article I am going to walk you through the installation process of the ESP32 drivers on Windows. Make sure to visit our website.
In this article, I am going to demonstrate you installation process of the driver for the CP210x family of USB to UART bridge chips. A lot of ESP32 development boards is using this chip to support USB communications.
CP210x USB to UART bridgeCopy permalink to clipboard
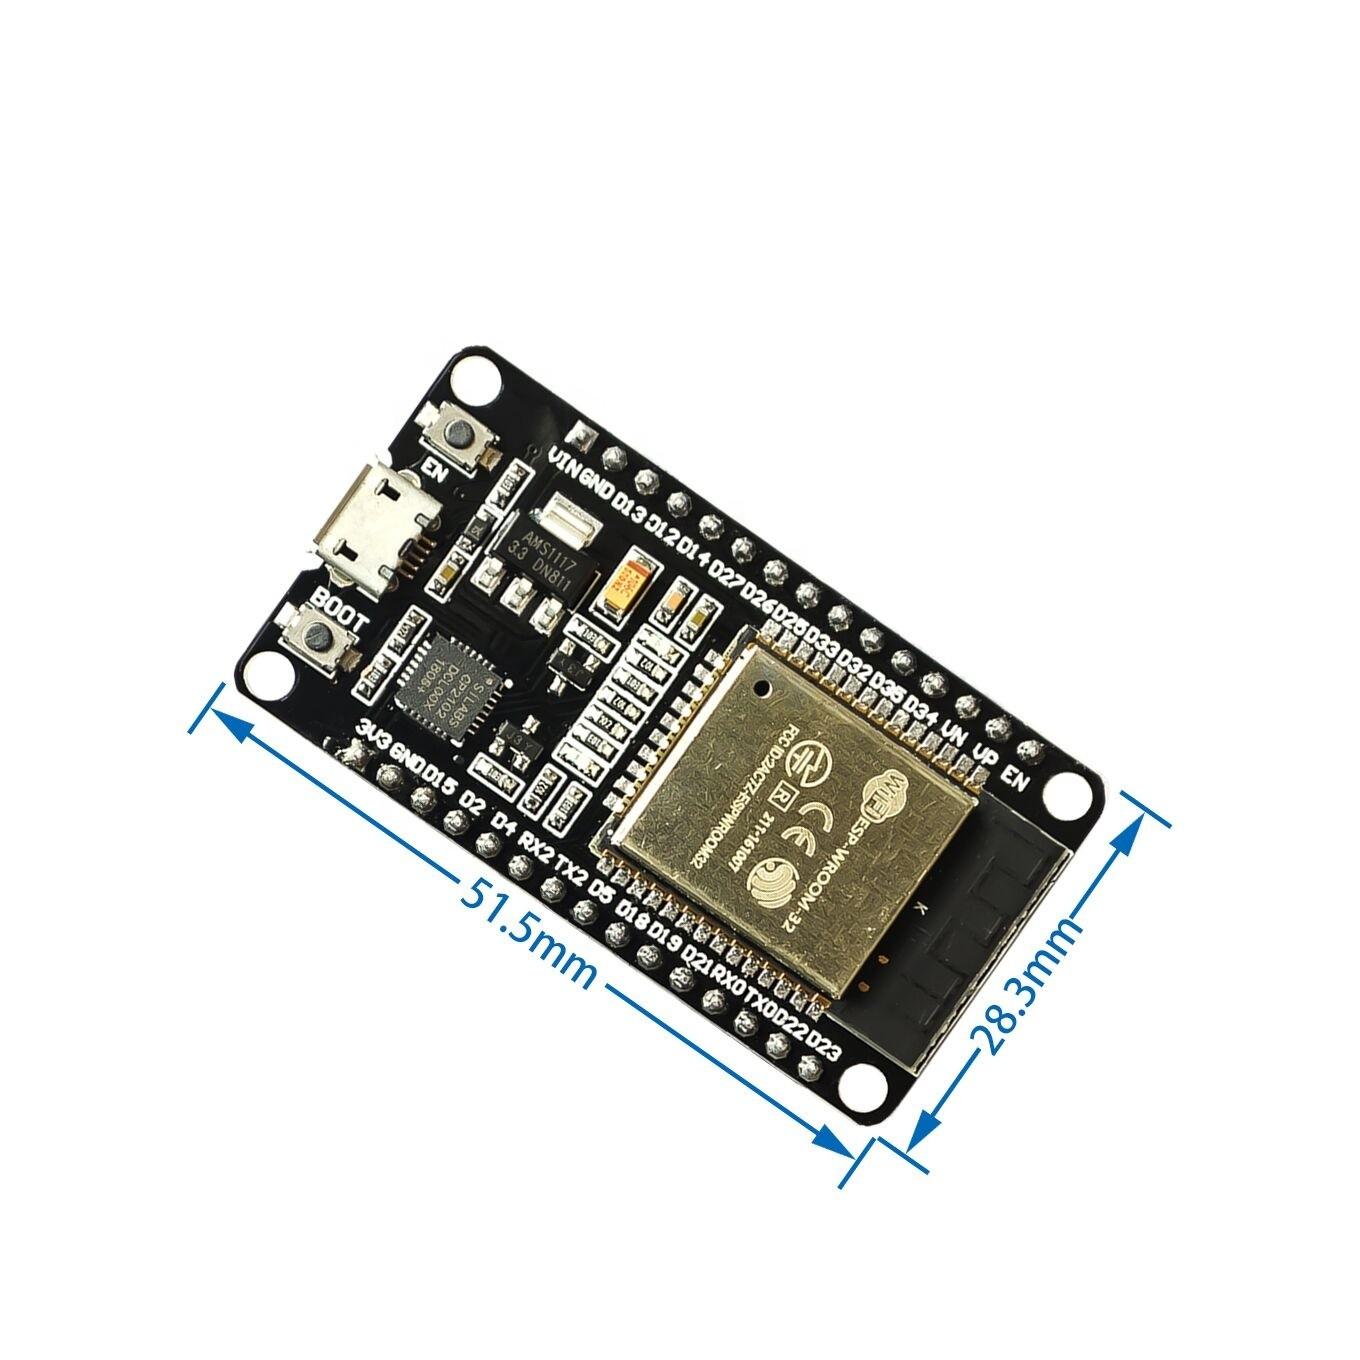
At the beginning before we start , I would like to point something out. It is about small differences between different ESP32 development kits.
One of them is the chip that is utilized to implement the USB to UART bridge that enables the USB programmability of the board.
ESP32 that I own include this chip and it requires a driver that needs to be installed manually, because Windows does not install it by default.
CP2102 USB-UART bridge chip
If you do not install this specific driver you won't upload a sketch to the board.
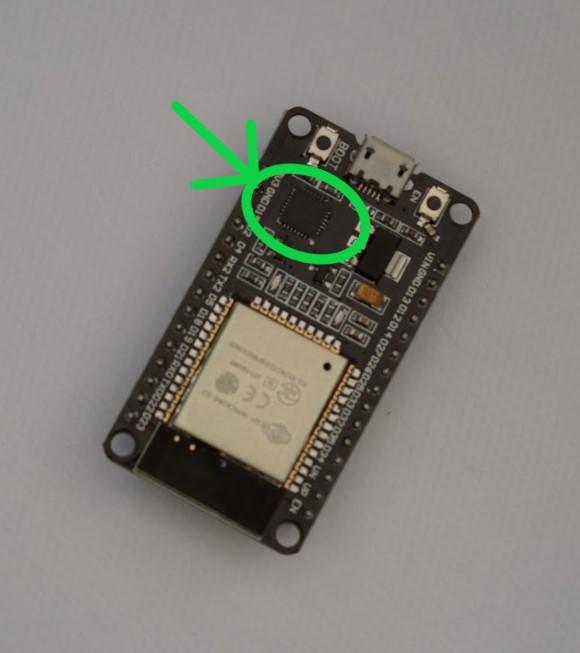
Find your board's bridge chipCopy permalink to clipboard
The board I am using uses the CP2102 bridge chip. CP210x family are very popular USB to UART bridge chips , so there is a chance that your ESP32 is using the same chip as mine.
In order to identify the USB to UART bridge chip on your dev board at first read the model number. It might be very hard , because a lot of the UART bridge chips contain the text that is no readable. If that is the case you need to head over to esp32.net/usb-uart/.
On that website you can find lists of bridge chips and the ESP32 on which they are used.
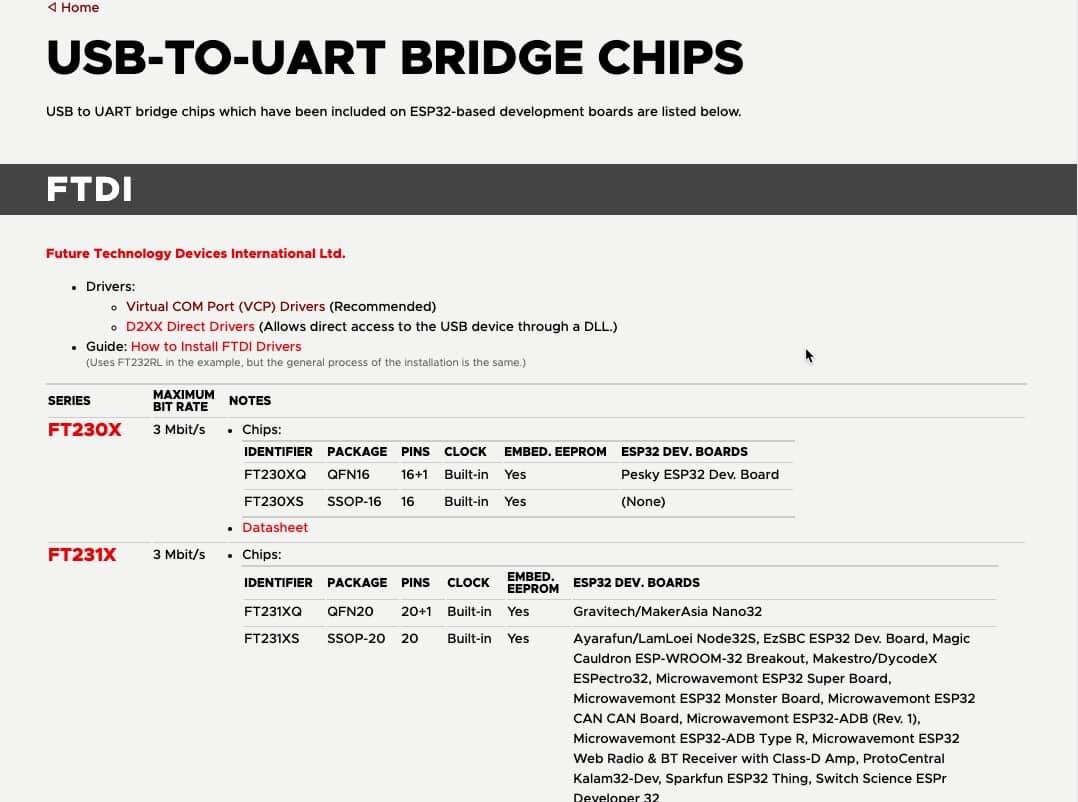
Go to esp32.net/usb-uart/ where you can find useful information about your ESP32's UART bridge chip.
Find out if you need to install the bridge driverCopy permalink to clipboard
There is one thing to note. USB bridge chip on your ESP32 dev kit might be already supported by your operating system.
Plug in your ESP32 to the computer via USB to find out.
After that , open your Arduino IDE and choose: Tools > Port.

If your dev kit port doesn't show up there it means you will have to install the USB-UART driver.
Install the USB-UART driverCopy permalink to clipboard
By visiting esp32.net/usb-uart/ discover which USB-UART bridge chip is used in your ESP32 development board. Mine uses CP2102.
Having the model number, find the proper driver for your operating system.
Visit Silicon Labs website in order to do that.
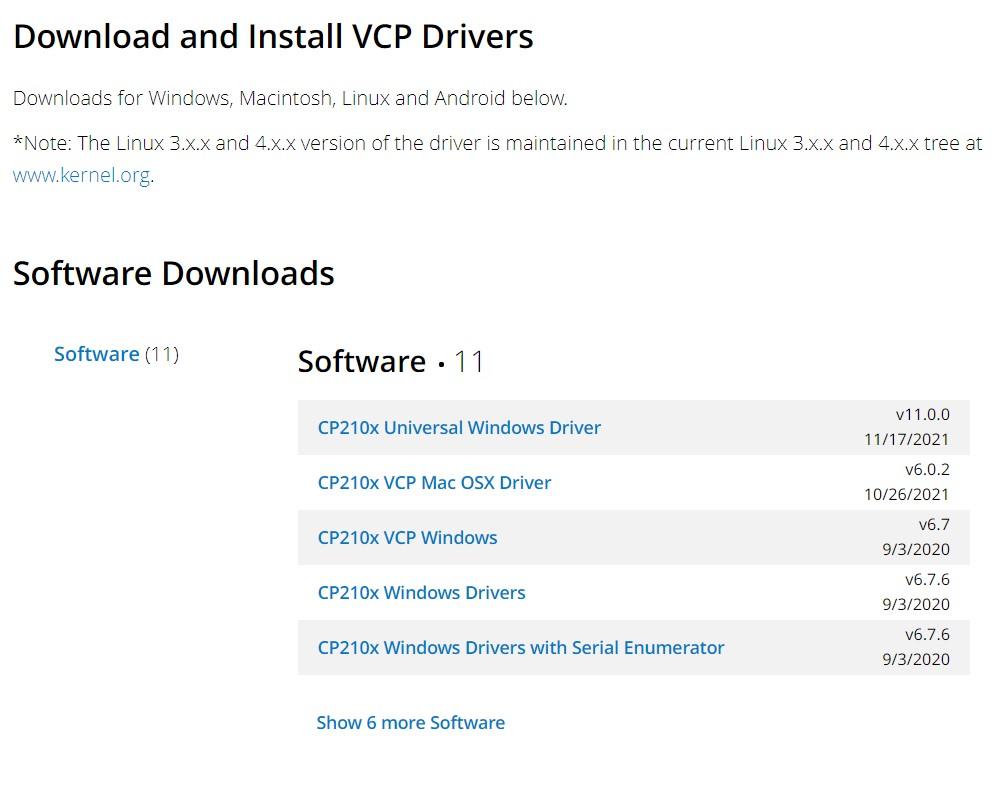
Download the driver for your operating system and install it.
Once installation is completed , probably you will have to restart your operating system. If not , make sure to restart Arduino IDE instead.
Test the driver installationCopy permalink to clipboard
You should test the driver installation once it is completed.
Start or restart your Arduino IDE.
Plug in your ESP32 dev kit to your computer.
Select Tools > Port.
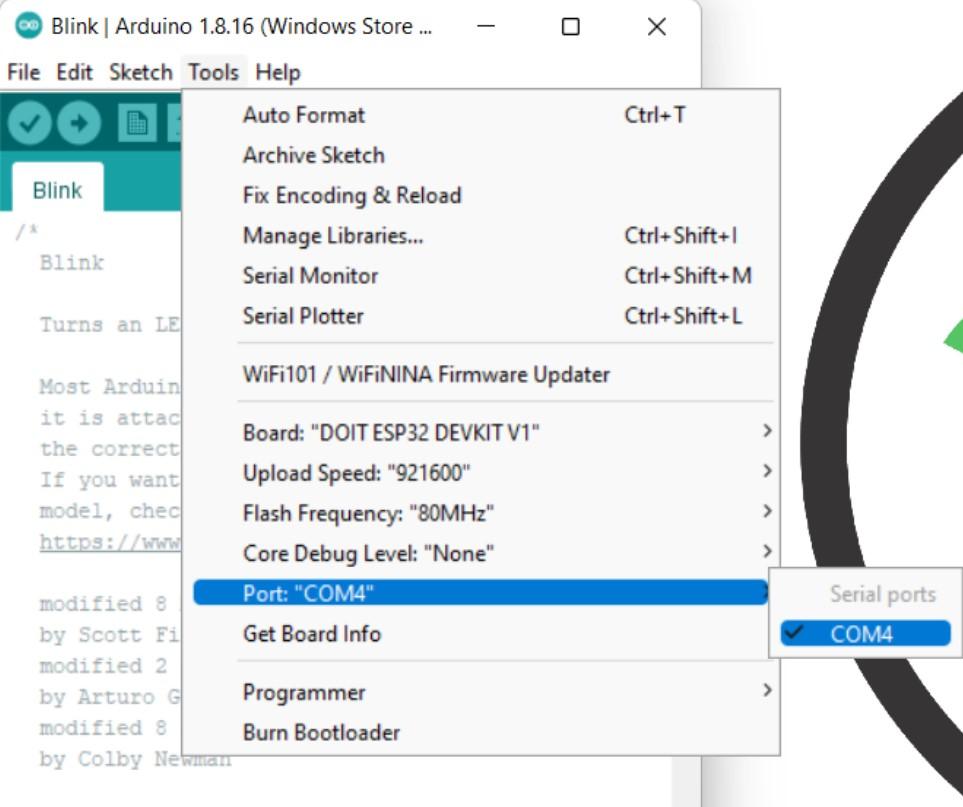
Installation of the driver was succesful. My ESP32 dev kit is displayed in the port menu.
Click on it to make it active.
After that, upload the current sketch. We need to determine that uploading works as it is supposed to.
Click on the Upload button.

Uploading successful.
By looking at the log messages in the Arduino IDE you can see the progress of the upload process until it reaches 100%, and the hash of the data is verified. Once it is done, your ESP32 will reset and the uploaded sketch can start running.
That's it. After you completed all the steps above you can start your adventure with your dev kit.